If you’ve ever stood by a well-built water feature—its edges soft and natural, the water clear and still, no awkward gaps where stone meets liner—you know it’s not just a pretty addition to a backyard, pond, or commercial space. For nearly a decade, I’ve run a Water Feature Stones supply business, and one of the most common questions customers bring to me isn’t “what kind of stone should I buy?” It’s “how do I make sure those stones don’t leak, shift, or ruin the liner I worked hard to install?” Water Feature Stones
I used to skip over these questions, figuring anyone tackling a DIY water feature would either watch a random YouTube tutorial or wing it. But then I saw the same mistakes over and over again: customers buying cheap, sharp river rocks that punctured EPDM liners, laying stones too heavy in shallow spots that caused liner tear, or skipping the base layer altogether and watching their feature collapse in a month. Lining a water feature with stones isn’t just about gluing rocks together and calling it a day. It’s a mix of science (knowing how liner, stone, and water interact) and practical know-how (knowing which steps save you hundreds in repairs later). Today, I’m breaking down the process I teach every contractor and DIYer who works with our stones, so you can get it right the first time.
First, let’s get the basics straight: why line with stones at all? A lot of people ask why not just build a pond out of concrete or leave a liner exposed. Concrete can crack, is expensive, and has a harsh, industrial look. Exposed liners fade in sunlight, show every wrinkle, and can be a tripping hazard around edges. Stones? They’re natural, durable, and soften the look of any hardscaping. But not all stones work for this, and not all installation methods are equal. Let’s start with prepping, because that’s where most failures start.
Before you even touch a stone, you need to prep the hole or base for your feature. I know, I know—digging is the worst part of any outdoor project, but it’s non-negotiable. Start by excavating your feature to the right depth, leaving a gentle slope from the back edge down to the water pump’s resting spot. For a small backyard bird bath or tabletop feature, 6 to 12 inches deep is enough; for a large backyard pond or commercial fountain, you’ll need 2 to 4 feet, with a 1 to 2 inch slope per 10 feet to keep water circulating evenly. Once you’ve got the shape, you need to smooth out the base completely. No sharp roots, no jagged rock fragments, no clods of dirt. Even a tiny ¼-inch sharp stone can poke through a liner and cause a leak that drains your feature in a week. For this step, I always recommend adding a base underlayment.
Underlayment is the unsung hero of any well-lined water feature. It’s a thick, flexible fabric (usually polypropylene or polyester) that sits between the excavated ground and your liner, and it serves two key purposes: it protects the liner from sharp debris in the soil, and it adds a layer of cushioning that lets the liner move slightly with temperature changes (liners expand in hot sun, contract in cold weather) without tearing. Don’t skimp here—avoid cheap 6-millimeter underlayment from big box stores; go for 12-millimeter or thicker, which is designed specifically for water features. Lay the underlayment over the entire base and up the sides of your excavated hole, overlapping seams by 12 inches, and weight the edges down with a few heavy rocks while you work to keep it from shifting.
Next comes the liner itself. For most residential and commercial features, I recommend EPDM rubber liner—it’s durable, flexible, and UV-resistant, and it works with nearly every type of stone. Measure your liner correctly: add 12 inches on all sides for the edge overlap (you’ll need that to seal the top of your feature later), and make sure it’s big enough to cover the entire base and sides without pulling tight. Lay the liner over the underlayment, tucking it gently into the slopes of your excavated hole, smoothing out all wrinkles as you go. Wrinkles are a problem because they trap water debris, but more importantly, if you put a heavy stone on a wrinkled liner, the pressure can cause a permanent crease that will tear over time. Once the liner is smooth, you can start thinking about stones.
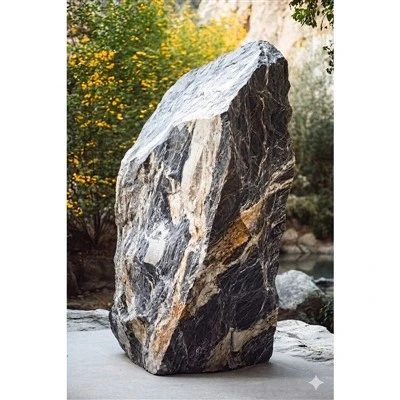
Now, the fun part: choosing the right stones for your project. This is where my business comes in, and I’ll be honest—some stones work way better for lining features than others. First, avoid stones that are too sharp or jagged. Any stone with a pointed edge or a rough, fractured surface can puncture even the thickest liner, especially if the stone is heavy and sits in the same spot year-round. That’s why our water feature stones are hand-sorted and pre-checked for smooth edges—no sharp fragments, no tiny pebbles that can work their way through liner seams. Next, consider the size and weight of the stones. For the base layer of your feature (the stones that sit directly on the liner), go with medium to large angular or rounded rocks—1 to 5 inches in diameter, depending on the size of your feature. Small pebbles or gravel seem like a good idea, but they can shift under water pressure, and if you use too many, they can get sucked into pump filters, causing clogs and motor damage. For the edges of your feature, where you’ll see the most, you can go with larger, more decorative boulders—just make sure their weight is evenly distributed. Heavy boulders on a thin liner can cause the liner to stretch and tear, so if you’re using boulders over 50 pounds, add a small layer of sand under them to distribute the weight evenly.
Wait, let’s circle back to a common mistake: some people want to glue every stone in place so they don’t shift. I get it—no one wants a stone floating across their pond every time the pump turns on—but glue can be a bad idea for two reasons. First, most construction adhesives contain chemicals that leach into water and harm fish, plants, and beneficial bacteria in the feature. Second, if you ever need to repair the liner or clean the feature, glued stones mean you have to chisel them off, which can damage both the stone and the liner. My rule of thumb for lining: leave the stones loose, but arrange them tightly so they don’t shift. For edges that are on a slope, you can tuck the back of each stone under the liner and the underlayment, so the weight of the stone holds it in place. For flat surfaces, arrange stones so their edges fit against each other like a puzzle—small gaps are fine, as long as they’re not so big that a stone can move around.
Now, let’s walk through the full installation step-by-step, so you don’t miss anything. I’ve tested this process on everything from 2-foot tabletop fountains to 10-foot commercial ponds, so it works for all sizes.
Step 1: Excavate your feature to the correct depth with a gentle slope. Remove all roots, sharp rocks, and debris from the excavated area. If you have any soft spots in the soil, add a 2-inch layer of compacted sand to stabilize it—soft ground can cause the liner to sink and tear over time.
Step 2: Lay your underlayment. Cut it to fit, overlapping seams by at least 12 inches, and trim any excess. Weight the edges with temporary rocks so it doesn’t blow around or shift while you’re working.
Step 3: Install your liner. Unroll the EPDM liner over the underlayment, smoothing out all wrinkles and making sure it covers the entire base and sides of your feature. Don’t pull it tight—leave a little slack (about 1 inch per foot of feature width) to let it expand in hot weather. Tuck the excess liner over the top edges of your excavated hole for now, so it’s out of the way.
Step 4: Add a base layer of stones. Start with medium-sized stones (2 to 4 inches) that are smooth and rounded, not sharp. Spread them in a 3 to 4 inch layer over the entire base of your feature. Arrange them tightly, with minimal gaps, so they distribute weight evenly and don’t put too much pressure on any part of the liner. For smaller features (under 3 feet wide), you can use a 2-inch base layer, but never less than 2 inches—too thin, and the stones can puncture the liner.
Step 5: Add edge and decorative stones. For the edges, use larger boulders (10 to 50 pounds) to create a natural, finished look. Tuck the back of each boulder under the liner and underlayment, so the weight holds it in place. For gaps between edge stones, you can use smaller, smooth pebbles or decorative gravel—just make sure they’re not small enough to get sucked into the pump. Arrange decorative stones around the water feature (like small waterfall stones, if you’re adding a spillway) so they look natural, not like they’re stacked randomly. Avoid covering more than 70% of the liner surface—you need some areas to let water circulate and stay oxygenated, which is important for plants and fish (if you plan to have them).
Step 6: Seal the top edges. Once all stones are in place, you need to secure the liner at the top so water doesn’t seep out. Fold the excess liner over the top edge of your excavated hole, and weight it down with more edge stones, or use a PVC pipe and cap to hold it in place. If you want a cleaner look, you can use caulk specifically designed for water features to seal the edge, but make sure it’s non-toxic—avoid silicone caulk, which can leach chemicals into water.
Now, what about common problems? Even when you follow all these steps, things can go wrong. Let’s talk about the most frequent issues I see:
Leaky liners: Most leaks happen from sharp stones puncturing the liner, or wrinkles trapping debris that erodes the liner over time. If you see a leak, turn off the pump, drain a small section of the feature, and pull back the stones around the leak spot. Smooth any sharp edges around the puncture, patch it with EPDM liner glue, and put a small piece of mesh under the area before replacing the stones.
Stone shifting: If your stones move around, it’s usually because they’re too small, or you didn’t tuck the back of edge stones under the liner. For base stones, make sure they’re at least 2 inches in diameter, and arrange them so they interlock a little. For edge stones, tuck the back ¼ of the stone under the liner and underlayment so it’s anchored.
Pump clogs: This is almost always from small gravel or pebbles getting sucked into the pump. If you want to use smaller decorative material, make sure it’s at least 1 inch in diameter, or install a mesh pre-filter on your pump’s intake to catch small debris.
I get it, this feels like a lot of steps, but it’s worth it. I’ve had customers tell me their water feature has lasted 10 years with no leaks, thanks to following this process. And if you’re not sure about the stones? That’s where I come in. As a Water Feature Stones supplier, we have a range of stones specifically designed for lining water features—smooth river rocks, angular landscape stones, and decorative boulders, all hand-sorted to remove sharp edges and debris. We also offer free consultations to help you pick the right stones for your size and type of feature, so you don’t waste money on the wrong materials.

If you’re planning to line a water feature with stones and need guidance on materials, installation tips, or custom stone selections, feel free to reach out to connect on your project needs. We’re here to help make your water feature durable, natural, and leak-free.
Japanese Garden Water Basin References:
- American Nursery and Landscape Association. Water Feature Installation Best Practices. 2022.
- EPDM Liners for Water Features: Manufacturer’s Installation Guide. Firestone Building Products. 2021.
- Stone Selection for Landscaping: University of Extension Publication, Purdue University. 2020.
- Water Quality and Feature Design: Aquatic Gardening Association Technical Bulletin. 2023.
- Underlayment Materials for Flexible Liners: International Landscape Contractor Association. 2021.
Orin International Trade Co., Ltd.
With abundant experience, we are one of the most professional water feature stones manufacturers and suppliers in China. We warmly welcome you to wholesale custom made water feature stones from our factory. If you have any enquiry about cooperation, please feel free to email us.
Address: No.3-1, Shangzhongdi Natural Village, Hexian Village, Shuangta Sub-district, Jiangshan City, Quzhou City, Zhejiang Province
E-mail: atlas@orinstone.com
WebSite: https://www.orinstone.com/
