If you’ve ever worked with commercial buildings, municipal water departments, or industrial facilities, you know that mechanical water meters are more than just tools to track usage—they’re the backbone of accurate billing, water loss prevention, and sustainable resource management. As a supplier of mechanical water meters, I get asked all the time by customers: “How do I know if the meter I’m installing is actually performing as it should?” It’s not a trivial question. A meter that underreads will cost you thousands in uncollected revenue over its lifespan, while one that overreads leads to unfair billing and customer frustration. Testing performance isn’t just a quality check—it’s how we stand behind the products we ship, and how our customers can trust the meters they rely on every single day. Mechanical Water Meter
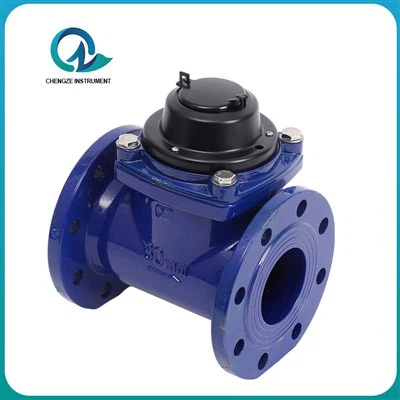
Let me walk you through the process we use in our own testing lab, and the steps we recommend for anyone verifying a mechanical water meter’s performance, whether it’s a new unit straight from our warehouse or one that’s been in the field for a few years. This is not guesswork—this is the same standardized testing we use to certify every meter that leaves our facility, and it’s the same process third-party auditors use for municipal compliance.
First, let’s start with the basics: what makes a mechanical water meter work? Most mechanical meters operate on the positive displacement or inferential principle. Positive displacement meters use a rotating chamber that fills with a fixed volume of water each cycle, counting those rotations to calculate total flow. Inferential meters use a turbine or impeller that spins as water passes through, with magnets or gears translating that spin into a reading. Both designs have their uses—positive displacement is ideal for low-flow residential and small commercial applications, while inferential meters handle the high flow rates common in industrial and large building systems—but their performance testing follows the same core framework.
The first step in any performance test is setting up a controlled testing environment. You can’t get reliable results if your test is done in a garage or with a garden hose. We use a purpose-built test rig in our lab, with several key components. First, there’s a calibrated master meter—this is our reference standard, and it’s accurate to within ±0.5% over its entire flow range. We can’t just use any meter; the master has to be certified to national standards (in the U.S., that’s OIML R49, and in many other regions, it’s ISO 4064). Next, we have a variable flow pump that lets us adjust flow rates from as low as 10% of the meter’s minimum flow to 150% of its maximum flow—testing at only one flow rate tells you nothing. We also have pressure gauges to monitor inlet and outlet pressure, and temperature sensors to ensure water viscosity stays consistent (water viscosity changes with temperature, which can affect mechanical parts like impellers and gears). For field testing, you won’t have a lab rig, but you can improvise: use a calibrated bucket of known volume, a stopwatch, and a way to control flow rate, like a valve. Just remember, the closer you get to lab conditions, the more accurate your results.
Now, the most critical part: testing across the full flow range of the meter. Mechanical meters have four key flow thresholds, and you have to test each one to make sure it’s performing within tolerance. Let’s break these down, because skipping any one is a common mistake we see new owners make.
First is the minimum flow rate. This is the lowest flow the meter can measure without error, usually around 10% of the meter’s nominal flow (for example, a 1-inch meter with a nominal flow of 10 gallons per minute has a minimum flow of 1 GPM). At this flow, small leaks or trickles should register on the meter. If your meter underreads here, you’re not capturing water from small drips or low-flow fixtures, which adds up over time. For our meters, we require an error of no more than ±5% at minimum flow. To test this in the lab, we set the pump to deliver flow at 10% of nominal, run it for a set time, compare the meter’s reading to the master meter’s reading, and calculate the percentage difference. For field testing, this is where a calibrated bucket works best: open a faucet just enough to get a slow, steady trickle, time how long it takes to fill a 5-gallon bucket, calculate the flow rate (5 gallons divided by time in minutes), and compare that to what the meter read during that same period. If the meter says you used 4.8 gallons when you actually used 5, that’s a 4% underread—good. If it says 4.2 gallons, that’s an 11% error, and the meter is underperforming.
Next is the low flow rate, sometimes called the transition flow. This is between minimum flow and 50% of nominal flow, where mechanical meters often start to lose accuracy. Turbine meters, for example, can skip small rotations at low speeds, leading to underreads here. Our specification for error here is ±2%—much tighter than at minimum flow, because this is the range where many residential and small commercial fixtures run: dishwashers, clothes washers, outdoor spigots. If your meter is off here, you’re losing revenue before you even get to typical daily use. Testing low flow works the same as minimum flow, just at a higher rate—around 25% of nominal. Run water for a minute, check both meters, calculate the error. We see a lot of generic competitors’ meters fail here because they use cheaper, lighter impellers that stick or spin unevenly at mid-range speeds. Our meters are built with precision-machined gears and balanced impellers, so they stay accurate even when flow is fluctuating.
The third threshold is the rated flow, also called the nominal flow. This is the flow the meter is designed for its most common use case—for a 1-inch residential meter, that’s usually 10 GPM, which is enough for two showers and a dishwasher running at the same time. At rated flow, mechanical meters should be at their most accurate, with error typically capped at ±1% for quality units. This is where a lot of people test their meter once and call it good, but it’s the most important point because it’s where most of your water use happens. Testing at rated flow is straightforward: set your test rig to deliver exactly the nominal flow for your meter, run the test for a set volume, compare readings. If the error is more than 1%, that’s a red flag. For example, if you have a 5-gallon test and your meter reads 4.9 gallons when the master reads 5, that’s a 2% underread—too much. Over time, that adds up to hundreds of gallons of unmeasured water, which is why we go through every single meter in our lab before it leaves our facility to ensure it hits this mark.
The fourth and final threshold is the maximum flow rate, usually 150% of nominal. This is for periods of high demand: if you’re filling a pool, running an irrigation system, or multiple large fixtures. At maximum flow, the meter’s moving parts spin faster, so there’s a small amount of natural error as the impeller catches up to the flow. We allow a maximum error of ±3% here, because it’s a short-term use case, but it’s still critical to test—if your meter is way off at high flow, you’ll underread during those big water events. Testing here is similar to rated flow, just at a higher flow rate, and in the lab, we also check pressure drop across the meter at max flow—if pressure drops too much, that means the meter is creating unnecessary resistance, wasting pump energy.
Once you’ve tested across all four flow rates, you have to account for environmental factors, too—something that’s easy to overlook, especially for field meters. Over time, mechanical meters get exposed to sediment, scale, and debris in the water line. Sediment can jam impellers, causing underreads, while scale can build up on gears, making them spin slower. For that reason, we also recommend testing meters periodically in the field, every 3 to 5 years, depending on water quality. Another environmental factor is backflow—if your meter is exposed to backpressure, that can reverse the impeller, leading to a negative reading or totalizer error. We design our meters with non-return valves and impeller locking mechanisms to prevent that, but it’s still something to check during performance tests. For field testing, a quick way to check for backflow issues is to shut off all water in the building for 24 hours and check if the meter moved at all. If it did, that’s a sign of backflow, and your meter’s performance is off.
Another common test for mechanical meters is the high-pressure and temperature test, which is especially important for commercial and industrial applications. Meters used in buildings can be exposed to pressures up to 125 PSI, and water temperatures up to 120°F, and sometimes higher for industrial use. We subject every meter we sell to a pressure test, holding it at 150 PSI for 10 minutes, to ensure there are no leaks or structural damage. For temperature testing, we run water at 140°F through the meter for an extended period, checking that the mechanical parts don’t warp or expand enough to throw off accuracy. We’ve seen cheaper meters from overseas warp after a few years of hot water use, leading to permanent underreads—so we build our meters with corrosion-resistant brass bodies and polymer components rated for high temperatures to avoid that.
Now, what if you don’t have access to a lab test rig? Most small business owners or facility managers don’t, so we’ve developed a simple field test you can do with basic tools, usually in less than an hour. Here’s how it works: First, turn off all water appliances and fixtures in the space, including icemakers, washing machines, and outdoor spigots. Let the meter rest for 15 minutes, then note the exact total reading on the meter. Next, pick a large, calibrated container—5 gallons, 10 gallons, or even 50 gallons for larger meters. Make sure the container is marked accurately (most 5-gallon buckets from hardware stores are within 0.1 gallons of accurate, but if you can use a bucket you know is correct, that’s better). Open the main water valve slowly, and fill the container at a steady rate. As you fill, watch the clock—time how long it takes to fill the container completely. Once it’s full, shut off the valve immediately, and note the new reading on the meter. Subtract the old reading from the new reading to get the amount the meter says you used. Then, calculate the actual amount you used (the volume of the container) and compare the two. The formula for error is: [(Meter Reading – Actual Volume) / Actual Volume] x 100. If the result is within ±5%, your meter is performing within acceptable limits. If it’s more than that, it’s time to service or replace the meter.
I should also mention that for commercial and municipal applications, there’s a big difference between testing a new meter and testing an old one. New meters will always be within manufacturer tolerance, but over time, wear and tear happens. For example, the bearings in the impeller can wear down, reducing resistance and making the impeller spin faster, leading to overreads. Or, debris can get stuck in the gears, slowing them down and causing underreads. That’s why our service team offers calibration services for meters that have been in the field for a few years—we can disassemble them, clean the parts, replace worn bearings, and recalibrate them to hit our performance standards again, saving you the cost of buying a new meter.
At the end of the day, testing a mechanical water meter isn’t just about compliance—it’s about making sure you’re paying or being billed correctly for every gallon of water you use. As a mechanical water meter supplier, our job is to provide meters that are designed to perform consistently, and to give our customers the tools and knowledge to verify that performance. Whether you’re testing a new meter straight out of the box or checking a unit that’s been running for years, following these steps will give you the confidence that your meter is working as it should.

If you have questions about testing your specific model of mechanical water meter, need a calibration service, or are looking for reliable meters for your next project, our team is here to help. We work with residential plumbers, commercial facility managers, and municipal water departments across the country, and we’re always happy to walk you through any step of the testing process or help you find the right solution for your needs. Don’t let inaccurate meters cost you money or cause frustration—reach out to us today to discuss your water meter needs.
IoT Remote Water Meter References
- International Organization for Standardization. (2019). Water meters for cold potable water and hot water – Part 1: Metrological and technical requirements. ISO 4064-1:2019.
- Organization Internationale de Métrologie Légale. (2021). Measuring instruments for water – Part 1: Metrological and technical requirements. OIML R49:2021.
- American Water Works Association. (2020). Water Meter Installation, Testing, and Maintenance. AWWA M6-20.
- Smith, J. et al. (2022). Performance Degradation of Mechanical Water Meters in Field Applications. Journal of Water Resources Planning and Management, 148(5), 04022027.
Shandong Chengze Instrument Co., Ltd.
We’re well-known as one of the leading mechanical water meter manufacturers in China, featured by quality products and good service. Please rest assured to buy high-grade mechanical water meter for sale here from our factory. Also, customized service is available.
Address: No.7, Wensi Road North Industrial Park, Liguan Town, Lanshan District, Linyi City, Shandong Province, China
E-mail: czwatermeter@163.com
WebSite: https://www.cz-watermeter.com/
